Wednesday, August 24, 2011

Golf Cart Rules and Etiquette

Observe the Rules of the Cart Paths

Golf Cart Rules
Know and observe golf cart rules and etiquette guidelines.
After paying your greens fee and cart fee, but before you clamber into that golf cart and speed off to the first tee, make sure you know what the course's cart rules are. Are you allowed to drive the cart onto the fairway? Or does the course have restrictions in place? Sometimes, the golf cart rules change day-to-day at the same course, depending on conditions. We'll go over the variations of golf cart rules you might see posted at your local golf courses, but first, here are a couple reminders of things you should never do in a golf cart:
  • Never drive the cart within hazard boundary lines, or within about 10 yards of water hazards or bunkers, or within about 50 yards of greens (unless you're on a designated cart path, of course). These areas are especially susceptible to damage by the wheels of golf carts. Never drive onto or close to tee boxes, either, unless on the cart path.
  • Never drive the cart through mud, on or off the fairway.
  • Never drive through casual water on any part of the golf course (unless it's a little bit of water over a paved cart path). The wheels of the cart can do serious damage to the turf, including leaving ruts, in wet areas.
  • Never go joyriding in the golf cart. In other words, don't act stupid! People do get injured in cart accidents. See golf cart safety for specific suggestions.
Now, as mentioned above, golf courses may post notices about specific golf cart rules depending on conditions at the course that day. These notices may be posted in the clubhouse; sometimes courses uses small signs they stick in the ground alongside the cart path on the route to the first tee. You should always ask when you check in what the course's standard golf cart rules are, then also be alert for any signage. What might the signage specify? Cart Path Only
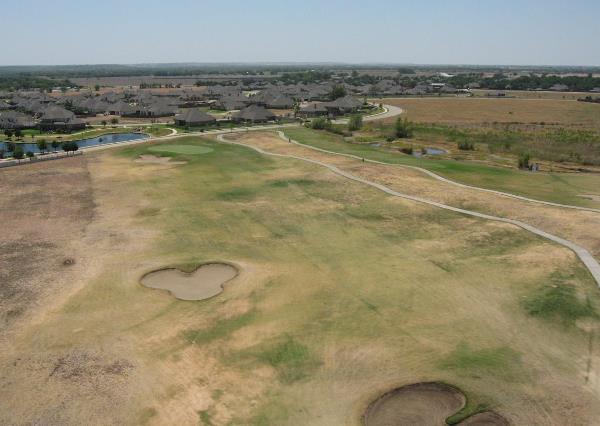
A "cart-path-only rule" is exactly what it sounds like: Keep your cart on the designated cart path at all times. Don't drive onto the grass.
Over time, golf carts speed up soil compaction, which can lead to less-than-ideal growing conditions for turfgrasses. And that can lead to less-than-ideal fairways for golfers. So even when "cart path only" is not in effect, it's a good idea to keep the cart on the designated path.
But when the rule is in effect, it's a requirement.
When "cart path only" is in effect, drive the cart on the designated path until you are parallel to where your golf ball rests on the course. Stop the cart, get out, pull a couple clubs (so you'll have some options when you reach your ball), and walk out to the ball.

90-Degree Rule In Effect

The "90-degree rule" means
that the golf course is allowing carts onto the grass 
but only at 90-degree angles from the cart path.
In other words, don't drive the golf cart up the middle of the fairway
from the tee box to your golf ball.
Stay on the cart path until you are at the same distance as your golf ball,
then turn off the cart path and drive straight to the ball.

The "90-degree rule" minimizes the time a golf cart spends rolling over the grass, while still allowing convenience for golfers.
Cart Path Only on Holes X and X
A course may post signs that designate certain holes off-limits to carts, for example, "Cart path only on No. 4 and No. 16 today." In this situation, the course's regular golf cart rules apply (remember, ask when checking in), but on the specified holes you are required to keep the cart on the designed cart path. The reason is usually moisture on the specified holes - they may be too wet for carts - or ground under repair on the specified holes.
No Carts Beyond This Point
This sign is one you might see in a fairway as you close in on the green. Courses don't want golf carts near the putting green; the "no carts beyond this point" sign makes sure golfers get that message. Even if you are allowed to drive the cart on the fairway, be sure to observe these signs. When you see one, stop and return to the designated cart path before proceeding forward again.
This sign may also come in the form of an arrow pointing toward the cart path. The meaning is the same: Don't take the cart beyond this point on the fairway; go back to the cart path.
So, those are the signs golfers are most likely to see on a golf course regarding cart usage. Observe the signs - and don't forget to ask about golf cart rules when you check in.
A few more bits of golf cart etiquette:
  • Always stay on designated cart paths on par-3 holes. Even if the course allows carts onto the fairways on par-4s and par-5s, stay off the grass on par-3s.
  • Observe common-sense driving rules, just as do in your car on the road. Be especially careful at any cart-path intersections and in areas where bottlenecks occur (see golf cart safety for specific safety suggestions).
  • If you need to drive the cart quickly around the course (maybe you left a club behind a few holes back, maybe you badly need to find a restroom, etc.), be aware of golfers you are passing by. If a golfer is about to swing or attempt a putt, slow down as you approach and stop the cart until the golfer has completed his or her stroke. Carts are noisy. Be courteous. You wouldn't want someone else making noise during your backswing, don't do it to others with your cart.
  • Along the same lines, many golf carts beep when they are in reverse. So if you need to put the cart in reverse, be aware of any golfers close to you and whether they are about to begin a stroke.
  • When you finish a hole, walk off the green, get into the cart and move on to the next teeing ground before marking the scorecard. In this way, you won't hold up any group behind you that is waiting for the green to clear.

Tuesday, August 23, 2011

How to Rake Sand Bunkers

Find the Best Entry and Exit Point
How to Rake a Sand Bunker
Locate the lowest spot around the edge of the bunker that is conventient to your golf ball. This will be your entry and exit point. Identifying this spot keeps you from walking down a steep facing (possibly damaging the turf), stepping off a higher rim (leaving deeper footprints), or having to walk a longer distance which would require raking a greater area of sand.

Enter the Bunker with Rake

How to Rake a Sand Bunker
Once you've identified the most convenient low spot from which to enter and exit ... enter! Notice that the golfer is carrying the rake into the bunker with him. Contrary to what some golfers believe, it is not only within the rules to take a rake into a bunker with you, it is advisable to do so because it speeds up the process. (Note: Be sure you do not allow the rake to touch the sand, except when you drop it before playing the shot. If you do anything with the rake - or your club - that can be construed as "testing the condition of the hazard," then you are in violation of the rules. For more on this, see our Rules FAQ, "Is it illegal to take a rake into a bunker?")

Play Your Shot

How to Rake a Sand Bunker
Play the shot. Notice that the golfer has dropped the rake directly behind the area where he has taken his stance. You should drop the rake at a convenient spot, within reaching distance. Otherwise, in retrieving the rake, you'll just add more area of sand that needs to be tended.

Smooth Over the Sand as You

Back Out of the Bunker

How to Rake a Sand Bunker
Begin raking over the signs of play from the sand - the area where your club made contact with the sand, and your footprints. Pull the tines of the rake toward you as you begin moving back to the rim of the bunker. But be careful not to pull too much sand toward you. The idea is to restore an even surface to the sand without displacing too much sand. If you are pulling too much sand toward you, try pushing the tines outward a few times, too. All the while, you should be progressing back to the edge of the bunker.

Exit the Bunker and

Complete Raking

How to Rake a Sand Bunker
To complete the raking, step out of the bunker and make your final few passes over the sand with the rake. Unless otherwise instructed at the golf course (check the scorecard and any bulletin boards inside the clubhouse), replace the rake outside the bunker parallel to the line of play (for more on this, see our FAQ, "Should rakes be left inside or outside bunkers?").

Admire Your Work

How to Rake a Sand Bunker
When you are finished, the sand's surface should be evened out, with no signs of divots or footprints, and no excess sand having been pulled toward the bunker's edge. There will be little furrows left from the tines of the rake. The important thing is that the sand be in as good or better condition than that which you found it in. Make sure golfers following behind you have a good quality bunker from which to play any necessary sand shots.

Monday, August 22, 2011

How to Repair Divots

how to repair divotsAbout.com Golf
Most good swings on well-struck iron shots produce a divot in the fairway. The word "divot" actually refers to two different things: the top layer of turf that is sliced off and sent flying as your iron enters the ground; and the resulting scar, or patch of bare earth, that is left in the fairway. If you look closely, in the photo above, just to the left and forward of the golfer you can see part of the divot flying away.
Repairing divots is an important duty of golfers who create them. According to the Golf Course Superintendents Association of America, a repaired divot can speed up the healing process (meaning: the grass will cover over the scar in the fairway) by a couple weeks, as opposed to an unrepaired divot.

Identify Your Divot

how to repair divotsAbout.com Golf
Yep, that's a divot all right. The golfer's iron has sliced off the top layer of turfgrass, exposing the sod underneath. (This happens because irons are designed to strike the ball on a descending path, meaning that they continue downward and into the ground after making contact with the ball. See the article "Hit Down, Dammit!" for more explanation of this concept.)

Choose the Appropriate 

Method

how to repair divots
Now that you've taken a divot, what's your correct course of action? There are two ways of repairing, or "fixing," divots. One is to fill the divot with sand or a sand-and-seed mixture; the other is to retrieve the turfgrass/sod patch that was sliced off and put it back in place. How do you know which is the proper course of action where you are playing? Check the golf cart. If the course wants you to use sand, they'll provide it for you. The sand (or a mixture of sand and seed) will be in a carafe that sits in a what looks like a large cupholder. The cupholder is usually attached to the frame that holds up the roof of the cart.
If you see this container of sand on the cart, the golf course is telling you to use sand. If you don't see it, then you'll put the turf back in place (which we'll see a couple pages forward). On the cart above, we see that sand is provided, so ...

When Using Sand or Sand/Seed

Mix, Pour Into Divot

how to repair divotsAbout.com Golf
Take the container of sand and simply pour the sand, or sand/seed mix, into the divot. Pour enough to fill the divot.

Smooth Over Sand to

Level Out Divot

how to repair divotsAbout.com Golf
One you've filled the divot, use your foot to smooth over and tamp down the sand. And you're done! Such a simple thing to do, yet it helps the golf course heal. But what if no sand is provided on the golf cart? In that case, you'll do something a little different ...

No Sand or Sand/Seed Mix

Means Replacing the Displaced Turf

how to repair divotsAbout.com Golf
When no sand is provided, find the turf that was sliced off from the fairway. If you've taken a "clean divot," you'll find the turf still in one, neat piece. But sometimes, the turf will be in bits in pieces. Just retrieve it as best you can, and replace it in the ground. If your divot is in one piece, then fit it back into the ground the same way it came out (as you would a puzzle piece). If it's in multiple pieces, just do the best job you can to make it fit neatly back into place.

Tamp Down Replaced Turf

To Complete Repair

how to repair divotsAbout.com Golf
When the turf is back in the ground, tamp down with your foot, and you're done. Repairing divots is not always a necessity; with certain types of turfgrasses, at certain times of the year, repairing the divot won't make any difference, good or bad, to the health of the golf course. But unless you are certain that's the case where you play, and when you're playing, you should always repair your divots on the golf course.

Sunday, August 21, 2011

Why It's Important to Repair Your Ball Marks on the Green

ball mark repair
During a tournament on the Champions Tour, Mark Johnson (center), Morris Hatalsky (left) and Ben Crenshaw take time to repair their ball marks. If they can do it, so can you.
Dave Martin / Getty Images
Ball marks - also called pitch marks - are the bane of smooth-putting and healthy greens on golf courses all over the world. They're the little depressions, or craters, sometimes made when a golf ball descends from the sky and impacts the putting surface. Repairing those little depressions is very important. Equally important is doing it the right way. Because while many golfers fail to repair ball marks - and shame on you if you are one of them - there are also many well-meaning golfers who do "repair" the pitch marks, only to do so incorrectly.
A ball mark can cause the grass in the depression to die, leaving not just a scar but also a pit in the putting surface that can knock well-struck putts offline. Repairing a ball mark restores a smooth surface and helps keep the grass healthy. But "repairing" a ball mark incorrectly can actually cause more damage than not attempting to repair it at all, according to a study done at Kansas State University.
The KSU researchers, whose conclusions were reported on Cybergolf.com, found that incorrectly "repaired" ball marks take up to twice as long to heal as those that are properly repaired.
So golfers, lets all start fixing our ball marks, and doing it the right way. And if you have a moment - if there isn't another group of golfers behind you waiting for you to clear the green - fix one or two other ball marks, too, if you find more of them on the green.
Repairing ball marks isn't just important for the health of the greens, and for smooth-rolling putts. It isn't just a matter of golf etiquette. It is our obligation to help take care of the golf courses we play. And repairing ball marks is a big part of that obligation to the game.
On the next few pages are illustrations courtesy of the Golf Course Superintendents Association of America, and text explaining the right way to fix ball marks.

How to Repair Ball Marks

The ball mark repair tool is the right tool for the job of repairing ball marks. The tool should be familiar to every golfer; it's a simple tool, just two prongs on the end of a piece of metal or hard plastic. There are some newfangled ball mark repair tools on the market, but the jury is still out on whether any of them really do a better job at helping greens heal than the standard, old-fashioned tool pictured above.
By the way, you'll sometimes see this tool referred to as a "divot repair tool." It's not used for repairing divots, of course, so that name is inappropriate. But if you do see that term, this is almost certainly the tool to which it is referring.
The ball mark repair tool is an essential piece of equipment that every golfer should have in his or her golf bag.
Insert the Ball Mark Repair Tool
The first step in repairing ball marks is to take your ball mark repair tool and insert the prongs into the turf at the edge of the depression. Note: Do NOT insert the prongs into the depression itself, but at the rim of the depression.
Push Edges of the Ball Mark Toward the Center
The next step is to push the edge of the ball mark toward the center, using your ball mark repair tool in a "gentle twisting motion," in the words of the GCSAA. This is the step where golfers who incorrectly "repair" ball marks usually mess up. Many golfers believe the way to "fix" a ball mark is to insert the tool at an angle, so the prongs are beneath the center of the crater, and then to use the tool as a lever to push the bottom of the ball mark back up even with the surface. Do not do this! Pushing the bottom of the depression upward only tears the roots, and kills the grass.
So remember:
Wrong: Using the prongs as levers to push up the bottom of the depression.
Right: Using the prongs to push grass at the edge of the depression toward the center.
Just use your ball mark repair tool to work around the rim of the crater, so to speak, pushing the grass at the edge toward the center of the depression. One way to envision this is to picture reaching down with your thumb and forefinger on opposite sides of the ball mark and "pinching" those sides together.
Smooth Over and Admire Your Work
Once you've worked around the rim of the ball mark with your repair tool, pushing the grass toward the center, there's only one thing left to do: Gently tamp down the repaired ball mark with your putter or foot to smooth the putting surface. Then admire your work and pat yourself on the back for helping to take care of the golf course.

Arnold Palmer "10 Rules for Good Golf Etiquette"

August 2008
I. Don't be the slowest player
In my casual games at Bay Hill, we get around in under four hours -- and that's in fivesomes. Evaluate your pace of play honestly and often, and if you're consistently the slowest one in your group, you're a slow player, period. Encourage everyone to move quickly enough so you find yourself right behind the group in front several times, both early and late in the round.
Remember the old staples of getting around in good time: Play "ready golf" (hit when ready, even if you aren't away) until you reach the green, be prepared to play when it's your turn on the tee and green, and never search for a lost ball for more than five minutes.
II. Keep your temper under control
In the final of the Western Pennsylvania Junior when I was 17, I let my putter fly over the gallery after missing a short putt. I won the match, but when I got in the car with my parents for the ride home, there were no congratulations, just dead silence. Eventually my father said, "If I ever see you throw a club again, you will never play in another golf tournament." That wake-up call stayed with me. I haven't thrown a club since.
Throwing clubs, sulking and barking profanity make everyone uneasy. We all have our moments of frustration, but the trick is to vent in an inoffensive way. For example, I often follow a bad hole by hitting the next tee shot a little harder -- for better or worse.
III. Respect other people's time
Because time is our most valuable commodity, there are few good reasons for breaking a golf date. Deciding last-minute to clean the garage on Saturday, or getting a call that the auto-repair shop can move up your appointment by a day, just doesn't cut it.
Always make your tee times, and show up for your lesson with the pro a little early. Social functions are no exception.
IV. Repair the ground you play on
I have a penknife that's my pet tool for fixing ball marks, but a tee or one of those two-pronged devices is fine. As for divots, replace them or use the seed mix packed on the side of your cart.
Rake bunkers like you mean it. Ever notice that the worse the bunker shot, the poorer the job a guy does raking the sand? Make the area nice and smooth -- don't leave deep furrows from the rake. Before you exit the bunker, ask yourself, Would I be upset if I had to play from that spot?
V. Be a silent partner
During one of my last tour events as a player, I noticed another pro making practice swings in my field of vision as I was getting ready to hit a shot. I stopped, walked over and reminded him (maybe too sternly) that it was my turn to play. The point is, stand still from the time a player sets himself until the ball has left the club.
Even with the advent of spikeless shoes, the etiquette rule of never walking in someone's line of play on the putting green is an absolute. The area around the hole in particular is sacred ground. The first thing to note when you walk onto a green is the location of every ball in your group, then steer clear of their lines to the hole.
Know where to stand and when to keep quiet. Position yourself directly across or at a diagonal from a player setting up. Never stand on the line of play, either beyond the hole or directly behind the ball. When a player is about to hit a shot, think of the fairway as a cathedral, the green a library.
VI. Make your golf cart 'invisible'
Carts are very much a part of the modern game. Think about it: They're mentioned on the backs of scorecards, discussed in the Decisions on the Rules of Golf, bags and other items are designed specifically for them, and they're used at most courses. The sheer pervasiveness of them makes cart etiquette vitally important.
Your goal when driving a cart should be to leave no trace you were there. Because we tend to look where we're going and not where we've been, it's easy to damage the turf and not realize it. Avoid wet areas and spots that are getting beaten up from traffic. Golfers tend to play "follow the leader" and drive in single file out to the fairway before branching off. It's usually better to "scatter" -- everyone take a different route -- so cart traffic is spread out.
VII. Always look your best
From Bobby Jones and Walter Hagen to Ben Hogan and Sam Snead to Tiger Woods and Phil Mickelson, the best players have been meticulous about their appearance. Their clothing has been sharp, and not one of them has shown up on the first tee with his cap backward, mud caked on his shoes, or his shirttail hanging out. (My shirt often came untucked, but it was my swing that did it. I started with it tucked in!)
Your appearance speaks volumes about you as a person, and the neatly appointed golfer, like a businessman or someone headed to church, gives the impression he thinks the golf course and the people there are special.
VIII. Turn off the cell phone
Nobody knows less about technology than I do. But I know enough to recognize a cell phone when it rings in my backswing. If I had my way, cell phones would be turned off at all times on the course, but most clubs have given in to the fact that people are going to use them. I don't know all the gadgets and settings on those phones, but do whatever you have to do to keep it quiet. And if you absolutely have to make a call, move away from the other players. And keep the call so brief that they don't even know you made it.
IX. Lend a hand when you can
It's easy to help out your fellow players, if you just pay attention. One obvious way is looking for lost balls -- better yet, watching errant shots so they don't turn into lost balls. Pick up that extra club left on the fringe or the headcover dropped next to the tee, and return it to its owner after saying, "Nice shot!" And if you see a cart out of position or a provisional ball that needs picking up, don't just walk by.
X. Learn the little things
There are a hundred bits of etiquette I haven't mentioned, like laying the flagstick down carefully, tamping down spike marks when you're walking off a green, letting faster groups play through, and so on. All of these things are learned by observing, with a sharp eye and a considerate heart. Just know that golf has a way of returning favors, and every piece of etiquette you practice will be repaid tenfold.

Friday, August 19, 2011

USGA Drought of 2011 Continues


Overhead of drought stressed fairway
This bermudagrass turf will recover once the rains return - assuming it is not worn out by excessive traffic in the interim.  

There is no better time to document the failings in an irrigation system than with aerial photos taken during a drought. If you are wondering how to get inexpensive aerial photos like this one, check out othis brief video -  Kite Aerial Photography  by Jim Moore, USGA 


Much of the country suffered severe drought this year, and in some areas the dry, hot conditions continue to cause major damage to golf courses. With home lawns and parks also burning up, most golfers recognize that superintendents can only do so much to minimize the damage to their course. However, many are not aware that the damage suffered this year will affect courses for years to come. Facilities in the hardest hit areas have seen severe injury to trees, cracking of cart paths, and widespread damage to irrigation systems, in addition to the large-scale losses of turfgrass. Next year is likely to bring heavy weed pressure and reduced water allotments along with the continued loss of trees.  

As is the case with every challenge, those who are best prepared stand out from the rest. This free webcast covers a wide range of issues and provides real-world suggestions and observations to help you and your facility deal with a summer that many of us can't wait to be over.
   
The link below will take you to a site where you can view and/or download the webcast recording. No recording key is required so leave that field blank. Also, we recommend selecting the Microsoft Live Meeting Replay option since it is more compatible with various computers.
   
Please note that the webcast is approximately one hour in length so allow time for it to begin to play (depends on your connection speed). View or download the webcast recording 
  
Also, select this link to review a collection of USGA Green Section articles relating to drought and irrigation issues.
  

Thursday, August 18, 2011

Trees facing "Massive die-off"

Need sustained watering


Trees all over southeast Texas are under severe stress because of the drought, according to a story at Click2Houston.com:
“You are seeing just the tip of it. If we don’t get sustained precipitation, you are going to see a massive die off in the next two to three years. Something that will indeed exceed the loss of trees in a storm like (Hurricane) Ike,” said Barry Ward, executive director of Trees for Houston.
Ward said Memorial and Hermann parks could end up with 10 to 20 percent of trees gone if the current drought continues.
“If you think in broad terms of Harris County, that means millions of trees, and that will have a profound effect on the way our landscape looks,” said Ward.
Ward said no trees in the area should have brown leaves at this time of the year, and when the leaves die off this early in the summer, it will be a long, hard recovery.
The dry trees also continue to fuel dangerous fire conditions in the area. The drought is affecting all types of trees, including cedar, elm, pine and white oak. Houston’s live oak trees should be in a growing season in June, according to Ward, but instead are dying back.
Ward recommended watering a tree every three to five days with five gallons of water for every inch of diameter of the tree. He said the best way to water a tree and avoid evaporation or run off is to fill up a five-gallon bucket with holes poked in the bottom of it and let the water run out over the roots of the tree.
“It’s not a matter of just taking care of this in a week or two. It is a matter of needing sustained precipitation over the next three to four to five months just to get us back on an even keel. We have been in almost unremitting drought since Ike. So years of low rainfall, plus wind stress from Ike, with the exception of one wet winter, it has almost been nonstop stress on these trees. The drought now really is almost the straw that broke the camels back,” said Ward.

Hogs are back

This was posted by the Texas Parks and Wildlife;

Feral hogs (Sus scrofa) are an old world species belonging to the family Suidae, and in Texas include European wild hogs, feral hogs, and European-feral crossbreeds. Feral hogs are domestic hogs that either escaped or were released for hunting purposes. With each generation, the hog�s domestic characteristics diminish and they develop the traits needed for survival in the wild.

Introduction

group of hogs
Early Spanish explorers probably were the first to introduce hogs in Texas over 300 years ago. As colonization increased, hog numbers subsequently increased. They provided an important source of cured meat and lard for settlers.
During the fight for Texas independence as people fled for safety into the United States or Mexico, many hogs escaped or were released. It was not until the mid 1800s when hostilities between the United States and Mexico ended that settlers once again began bringing livestock back into Texas. The livestock included hogs that ranged freely. Many escaped, contributing to the feral population.
In the 1930s, European wild hogs, "Russian boars," were first imported and introduced into Texas by ranchers and sportsmen for sport hunting. Most of these eventually escaped from game ranches and began free ranging and breeding with feral hogs. Because of this crossbreeding, there are very few, if any, true European hogs remaining in Texas.
Feral hogs are unprotected, exotic, non-game animals. Therefore, they may be taken by any means or methods at any time of year. There are no seasons or bag limits, however a hunting license and landowner permission are required to hunt them.

Description

Feral hogs may appear basically the same as domestic hogs and will vary in color and coat pattern. A mature feral hog may reach a shoulder height of 36 inches and weigh from 100 to over 400 pounds. The extreme larger hogs are generally not far removed from domestication. Males are generally larger than females. European wild hogs are about the same size; however, their legs and snouts are usually longer and they have a larger head in proportion to the body. Their body is covered with long, stiff, grizzled colored hairs, long side whiskers, a longer straighter tail, and a nape on the neck giving the European hog a razorback, sloped appearance. The crossing of European and feral hogs often produces an offspring with some European characteristics. Feral hogs are more muscular than domestic hogs, and have very little fat.
Additionally, the hairs of European appearing hogs and their hybrids frequently have multiple split ends. The young are born a reddish color with black longitudinal stripes. As they mature, the coat color becomes predominantly dark brown or black.
Hogs have four continuously growing tusks (two on top, two on bottom) and their contact causes a continuous sharpening of the lower tusks. They have relatively poor eyesight but have keen senses of hearing and smell.

Distribution

distribution in Texas
Feral hogs are distributed throughout much of Texas, generally inhabiting the white-tailed deer range, with the highest population densities occurring in East, South and Central Texas. North and West Texas have very low or no populations. However, reports indicate that populations are beginning to expand and increase in these areas. There is currently an estimated population in excess of 1.5 million feral hogs in Texas.
The increase in population and distribution is due in part to intentional releases, improved habitat, increased wildlife management, and improved animal husbandry such as disease eradication, limited natural predators, and high reproductive potential. There seem to be very few inhibiting factors to curtail this population growth and distribution although extreme arid conditions may impede it.

Reproduction

mama and babies
Feral hogs are capable of breeding at six months of age but eight to ten months is normal, provided there is good nutrition. Under poor habitat conditions, sows have been known to eat their young. Gestation is around 115 days with an average litter size of four to six, but under good conditions may have ten to twelve young. While capable of producing two litters per year, research has shown the majority of sows have only one per year. Young may be born throughout the year with peak production in the early spring. The young are born with a 1:1 male to female sex ratio. Feral hogs generally travel in family groups called sounders, comprised normally of two sows and their young. Mature boars are usually solitary, only joining a herd to breed.

What do feral hogs eat?

Feral hogs are omnivorous, meaning they eat both plant and animal matter. They are very opportunistic feeders and much of their diet is based on seasonal availability. Foods include grasses, forbs, roots and tubers, browse, mast (acorns), fruits, bulbs and mushrooms. Animal matter includes invertebrates (insects, snails, earthworms, etc.), reptiles, amphibians, and carrion (dead animals), as well as live mammals and birds if given the opportunity. Feral hogs are especially fond of acorns and domestic agricultural crops such as corn, milo, rice, wheat, soybeans, peanuts, potatoes, watermelons and cantaloupe. Feral hogs feed primarily at night and during twilight hours, but will also feed during daylight in cold or wet weather.

Where do feral hogs live?

Feral hogs are found in a variety of habitats from moist pine forests in East Texas to the brush country of South Texas. They prefer bottomlands such as rivers, creeks, and drainages when available. Hogs are generally found in dense vegetation cover often associated with water, but also do well in drought prone environments. During hot weather, feral hogs enjoy wallowing in wet, muddy areas and are never far from dense protective cover. They will concentrate in areas of food availability, especially where there are nut producing trees or agricultural crops.
Their home range is based mainly on food availability and cover. It is usually less than 5,000 acres, but can range up to 70,000 acres. In general, boars have a larger home range and will also travel greater distances.

Will they harm livestock or wildlife?

Feral hogs compete directly with livestock as well as game and nongame wildlife species for food. However, the main damage caused to livestock and wildlife is indirect destruction of habitat and agriculture commodities. Rooting and trampling activity for food can damage agricultural crops, fields, and livestock feeding and watering facilities. Often wildlife feeders are damaged or destroyed. They also destabilize wetland areas, springs, creeks and tanks by excessive rooting and wallowing. In addition to habitat destruction and alteration, hogs can destroy forestry plantings and damage trees. While not active predators, wild hogs may prey on fawns, young lambs, and kid goats. If the opportunity arises, they may also destroy and consume eggs of ground nesting birds, such as turkeys and quail.

How long do hogs live?

The average life expectancy, under good conditions, in a wild hog population is about four to five years; however, they may live up to eight years.

What about feral hog mortality?

Mortality in feral hog populations is greatest in the young less than three months of age, mainly due to accident, starvation and predation. Adult mortality is largely due to hunting, parasites, disease and tooth deterioration. Predation by mountain lions, coyotes and bobcats is only a minor limiting factor.

Do feral hogs carry disease?

In general, diseases from wild hogs do not pose a significant threat to humans; however, some diseases can be transmitted to livestock and wildlife. It is important to keep all livestock vaccinated, especially where large feral hog populations are concentrated.
Various diseases of wild hogs include pseudorabies, swine brucellosis, tuberculosis, bubonic plague, tularemia, hog cholera, foot and mouth disease, and anthrax. Internal parasites include kidney worms, stomach worms, round worms and whipworms. Liver flukes and trichinosis are also found in hogs. External parasites include dog ticks, fleas and hog lice.

What is pseudorabies and swine brucellosis?

Pseudorabies, also known as "mad itch" is a swine herpes virus that may affect the respiratory, nervous and reproductive systems. Despite its name, it is not a rabies type disease but derives its name from the symptoms similar to a rabid animal. It is transmitted primarily through breeding but may also to be transmitted through respiratory secretions of the infected animal. Infected adult swine typically develop flu-like symptoms whereas young pigs can have severe respiratory and digestive symptoms and ultimately die. Pseudorabies poses no threat to humans but may be fatal to domestic livestock and pets.
Swine Brucellosis is an infectious, bacterial, reproductive disease that can cause abortion, low conception rates and other problems. It is transmittable to humans, known as undulant fever, and causes flu-like symptoms such as fever, chills, aches and pains. It is treatable with specific antibiotics.

How do I keep from contracting diseases?

Texas Parks and Wildlife Department recommends all hunters use disposable plastic or rubber gloves when field dressing or cleaning wild swine. Bury or burn the gloves and entrails and then wash your hands with soap and hot water. And finally, make sure the meat is thoroughly cooked.

Is the meat good to eat?

Yes, meat from feral hogs is extremely tasty and much leaner than penraised pork. The meat from older boars may be tougher and rank tasting if not prepared adequately. As with all pork, care should be taken and the meat well cooked. Otherwise, it should be prepared just like market hogs. The slower the meat is cooked, the more tender and tasty it becomes.

What is the difference between a hog and a javelina?

tracks of javelina, deer, and hog
Although somewhat similar in appearance and habits, feral hogs and javelinas are not related. While feral hogs are indeed true pigs, javelinas belong to a totally separate family of mammals. Javelinas are smaller, have an unnoticeable tail, only one dew claw on the hind foot, a scent gland near the base of the tail, a grizzled-grayish coat with a white band of hair around the shoulder or "collar," and are more social or herd-like animals. Although feral hogs and javelinas inhabit the same range in South and Central Texas, they are not compatible.

What is a hog shield that I hear about?

Feral hogs are equipped with a tough shoulder hide, which is made of a tough scar tissue. This is formed through continuous fighting and it hardens as the animal ages and survives more fights.

What are feral hog signs?

Because feral hogs are largely nocturnal, the visible signs they leave behind are often all there is to indicate their presence. These signs include wallowing, rooting, rubs, crossings, trails and scat (droppings). Wallows are found in muddy areas and are made where hogs root and roll in the mud. They do this to cool off and also the mud protects their skin from the sun and insects. Rubs are then made when hogs scratch or rub themselves on tree trunks, telephone poles, fence posts, and rocks leaving a noticeable sign with mud and hair often left clinging. The height of the rub often indicates the size of the hog.
Rooting is easily recognized because it looks as if the soil has been plowed. Most often rooting takes place over a large area. Some rooting holes can be as much as three feet deep, which possibly could cause vehicle damage. A hog track is similar to a deer track except the toes are more rounded and wider in comparison to length. Hog hair is easily distinguished from other mammals and may be found at fence crossings and rubs. Scat appears very much like that of a small calf, being dropped in several small piles, which is very distinct from deer pellets or predator cord-like droppings.

Are feral hogs dangerous?

All wild animals have the potential of being dangerous, especially when wounded or cornered. In a natural state, feral hogs will prefer to run and escape danger, and are not considered dangerous. Extreme caution should be maintained when tracking wounded animals, trapping animals or encountering females with young. Their razor sharp tusks combined with their lightning speed can cause serious injury.

How do I hunt feral hogs?

Although feral hogs are not classified as game animals, a hunting license is required to hunt them. Feral hogs are very intelligent and considered to be challenging quarry. Many hunters consider the long tusks and mean appearance a genuine trophy, in addition to the quality of meat. They also provide a great off-season challenge and opportunities to hone hunting skills and spend time in the field.
There are many hunting techniques used, including stand hunting over a baited area, quite often incidental to white-tailed deer hunting. Stalking or still hunting over baited areas and areas indicating recent hog activity, such as wallows, are commonly used techniques. Corn or milo, often soaked in water and allowed to sour and then buried underground is good bait.
Night hunting with a spotlight is often used; however, the local game warden must be notified beforehand. (There are certain laws which prohibit using artificial light where deer are known to range.) Hunting with well-trained dogs is another hunting method utilized and can be very exciting. Because the feral hog has such a tough hide the best rifle calibers to use should be a .243 or greater to prevent wounding and loss of the animal. Bowhunting, muzzleloading, and handguns are also popular among sportsmen to hunt feral hogs.

Additional control methods?

Trapping is a common method utilized by sportsmen and landowners. Live trapping enables the individual to harvest the animal, fatten it up, or sell it. It also allows numerous individuals to be caught at once without an active participant. Several types and designs of live traps can be utilized. The most common design is a 4 foot by 8 foot heavy duty cage with a spring door, root door (see diagram, p. 19), or drop door. Snares can also be used effectively when placed under fences in travelways that surround active areas; however nontarget animals may also be captured. In some areas of Texas, aerial gunning from a helicopter is an efficient technique. There are currently no birth control, toxicants or repellents registered for the control of feral hogs.

Can I wipe out a hog population through hunting or trapping?

The feral hog has managed to survive, adapt, and increase their numbers despite attempts at population control. While it is possible to keep the population in check with continuous control, it is highly unlikely to eradicate a hog population within an established range.

Should I stock feral hogs?

No, feral hogs are prolific breeders and can cause considerable damage. They can destroy habitat, and compete directly or indirectly with all other species of wildlife. While many hunters might like hogs as part of the lease, the adverse effects often counter any potential economic incentives. TPWD considers feral hogs nuisance animals and does not support the introduction of feral hogs. Feral hogs are considered an under-utilized resource on many Texas ranges.
The Texas Animal Health Commission has enacted regulations requiring all feral hogs in Texas to be tested and certified to be disease free before being released into the wild for whatever purposes. They may however, be legally transported to slaughter or livestock sale for slaughter. If stocking is desired, only castrated males (barrows) should be considered. Because they cannot reproduce, they will grow larger, fatter and often produce larger tusks.

How to Build a Better Hog Trap

by: Jeffrey Parrish and Rick Taylor
Trapping is a popular technique for controlling feral hog populations and obtaining good meat. Hog traps that have been used by Texas Parks and Wildlife Department to assist in the collection of hogs for study and research are the spring door and root door traps. They are considered "live" traps because no harm is done to the animal once trapped inside. This trap is lightweight for easy transportation and placement, yet strong enough to prevent even the stoutest hog from escaping.
The advantage of "Spring door (side-hinged)" and "Root door (hinged on top)" traps enables more than one hog to be trapped at a time. It is not uncommon for as many as ten hogs to be caught simultaneously. The first hog caught may act as a lure to trap additional hogs. The design of the door prevents the captured hogs from exiting the way they entered.

To Set The Trap

Before setting the trap, scout the area and try to locate fresh hog signs. Pre-baiting of an area at least a week in advance will help in getting the hogs to return to the area in which the trap is to be set. Set the trap on flat ground and wire the door open. Bait the inside of the trap, leaving a small trail of bait through the door to the outside of the trap to lure the hog inside. It helps to leave bait outside the trap to get the hog comfortable with feeding in and around the trap.
Leave the door wired open for several days so the hogs will get used to entering the trap for the bait. After it is apparent that hogs have been entering the trap, set the door open by placing a prop (stick, piece of wood, etc.) between the door and trap side or ground if a root door. Tie a piece of rope to the prop, stringing the rope loosely through the top of the cage, and let the remainder of the rope hang down into the cage. At this end of the rope, a bucket of soured corn or other type bait can be tied to complete the trap set.
As the hog enters the cage and starts feeding out of the bucket, the attached rope will pull the prop from between the spring door and the door jamb causing the trap door to close (if the hog hadn�t already knocked the prop loose). A trapped hog may entice additional hogs to enter by pushing through the closed spring or root door.

Tips

In some cases deer and other wildlife have been trapped inside hog traps. In the event you capture an unwanted guest, follow these steps for a safe release.
  • As quickly and quietly as possible approach the trap and secure the trap door fully open and leave immediately. A captured animal can inflict injury to itself out of fright and confusion trying to escape. After the unwanted animal has left, return to the trap and reset it.
  • Try to keep dogs and human activity from near the trap or the trap site. A hog has an acute sense of smell and if it notices unfamiliar scents an unsuccessful trap may result.
  • Hogs feed mostly at night, so it is best to check the trap first thing each morning. A trap left unattended for a day or two may result in finding a dead hog in your trap.
  • Be careful when handling the cage with trapped hogs inside. A captured hog is a dangerous animal and can attack you through the panel wire.
  • Prebaiting is extremely important. Remember to prebait with generous amounts of bait on a daily basis and give the hogs several days of entering and exiting the trap prior to setting it. The length of prebaiting time allowed increases success. Be patient and consistent and good luck.

Hog Trap Specifications

  • Materials: Frame: 3/8" or 1/4" steel rod or rebar.
  • Mesh: 4" Cattle Panel - galvanized.
  • Heavy duty galvanized spring for swing door.
traps (58K)
Weld all parts of frame to ensure strength and durability. After frame is constructed, tack weld cattle panels to frame on all sides, including bottom, to prevent hog from digging out. Take care not to leave any pointed ends of the cut panel sticking out.
Construct spring or root door separately and install so that opening in front operates as illustrated. The doors should be mounted on one side of the front panel and need to be at least 20-24" wide and 18-24" tall. For the spring doors, place a full length of 1/4" rod just inside the side of the trap side to act as a stop (as illustrated). Take care to measure accurately during construction so that spring door when closed will hit trap side stop. Using a heavy-duty spring available at most hardware stores), place one end on the spring door and one end to the front of the cage at the top. Cut the spring to fit so that it allows the spring door to slam shut securely. Do not use excessive tension on the spring that may prevent smaller hogs from entering. For root doors, the ground acts as the doorstop. The root door is hinged from the top and should be longer than the opening so it hits the ground inside the trap at about a 60- degree angle. A heavy piece of angle iron should be used as the bottom of the root door to make sure it stays on the ground but not too heavy to prevent smaller pigs from lifting it with their snout. An angled piece of panel should be placed on the inside side to cover the hole that is left from the angled door while the side of the trap covers the other hole.

Wednesday, August 17, 2011

Houston begins mandatory water conservation

As promised last week, Houston Mayor Annise Parker announced Monday the beginning of Stage 2 mandatory water conservation measures.
With the hot, dry summer offering no relief to Texas or Houston, Parker said the measures are needed to stabilize water levels in Lake Houston, which have dropped almost a foot since the beginning of August. The lower level necessitated moving water in from Lake Conroe for the first time since 1988.
"While these restrictions are mandatory, we will begin with warnings and an informational campaign because the goal is voluntary compliance," Parker said in a news release. "For those who insist on not being good neighbors, citations will follow."
Houston, which has three reservoirs on which to draw, does not have a water emergency, the mayor emphasized.

STAGE 2 MEASURES

· All water leaks that are detected must be repaired within 72 hours.
· Outdoor watering must be done between 8 p.m. and 10 a.m. Residents are limited to watering twice a week according to schedule. Those with even-numbered addresses may water on Sundays and Thursdays. Those with odd-numbered address are restricted to Saturday and Wednesday.
· Those who wish to report water leaks or serious violations may call the city service line at 311. The mayor's office said it is not encouraging neighbors to report on each other as a matter of course.
· Violation of water conservation measures will result in fines. The first violation will mean a warning placed on the door of the residence. After that, the fines are $150 for the first offense, $250 for the second, and no less than $350 or more than $2,000 for each subsequent offense. Enforcement will be done through the city's Department of Neighborhoods.

SUGGESTED CONSERVATION TECHNIQUES

· Keep showers under five minutes.
· Turn water off while brushing your teeth.
· Wash only full loads of dishes or clothes.
· Replace older model shower heads and faucet aerators with new low-flow models and install low water use toilets.
· Don't wash vehicles unless the dirt poses a driving hazard.
· Don't wash down any sidewalk, walkway, driveway, parking lot or any other hard-surfaced area.
· Don't fill our refill indoor or outdoor swimming pools, spas or whirlpools.


Read more: http://www.chron.com/disp/story.mpl/metropolitan/7698637.html#ixzz1VJpuE5Kp

Greens Aerification Cancelled

Monday August 22nd greens aerification has been cancelled due to extreme weather conditions. 

 Typically we'll apply layers of sand on the green in order to fill the holes left behind from the aerification and this sand may sit on the green surface for two to three hours to allow it dry out before it is worked into the holes. With temperatures reaching into the 100's and it really fells like 110 degrees that can cause serious turf burn. With this type of turf burns it generally takes awhile for recovery to happen.
With the Club Championships in 3 weeks and the Member/Guest coming up in 7 weeks. I feel like the smart decision is to reschedule this aerification to a better time, perhaps when we begin to cool off just a little. I hope everyone can understand this decision.

Thanks
Willy Plowman
Golf Course Superintendent

Drought Condition Postings

Southeast Texas Drought Information

Drought conditions are expected to persist or worsen into the summer
across Southeast Texas.
 

The Drought Information Statement is a summary of the current state of the drought, including precipitation deficits, local impacts, outlooks, and other information.  A statement is issued when severe drought (D2) is occurring within the NWS Houston/Galveston area of re
South: Texas continues to suffer from unprecedented drought.  Climate data show that the Lone Star State is in its driest ten-month period ever on record, in over a century of data.  This is unprecedented territory, as the precipitation deficits mount, and triple digit temperatures continue to increase water demand.  Significant, ongoing impacts related to agriculture, water supply and natural vegetation conditions have been reported.  Widespread Exceptional Drought (D4) is maintained in large part across the region. ...DROUGHT INFORMATION STATEMENT...

               ...UPPER LEVEL RIDGING SUPPRESSES RAIN
                       OVER SOUTHEAST TEXAS...

     ...HOUSTON HAS GONE 198 DAYS BETWEEN ONE INCH RAIN EVENTS...

         ...AUGUST 2011 ON PACE TO SMASH WARMEST MONTH EVER
                        BY TWO TO THREE DEGREES...

SYNOPSIS...
A STRONG AND PERSISTENT UPPER LEVEL RIDGE OF HIGH PRESSURE DOMINATED
AREA WEATHER THROUGH THE FIRST TEN DAYS OF AUGUST. ISOLATED SHOWERS
DEVELOPED ALONG THE SEA BREEZE ON AUGUST 1ST AND AND AGAIN ON THE
6TH AND THE 7TH...BUT MOST AREAS REMAINED DRY. THE WESTERN THIRD OF
THE REGION HAS REALLY BEGUN TO DRY OUT. COLLEGE STATION HAS ONLY
RECEIVED A TENTH OF AN INCH OF RAIN SINCE JUNE 23RD. SOMERVILLE AND
WASHINGTON STATE PARK HAVE RECEIVED LESS THAN A QUARTER INCH OF RAIN
OVER THE LAST SIX WEEKS. THE LACK OF RAIN HAS BEEN MADE MORE ACUTE
BY THE INTENSE HEAT WHICH HAS PLAGUED THE AREA. INLAND OBSERVATION
SITES ARE CONSISTENTLY REACHING OR EXCEEDING 100 DEGREES EACH
AFTERNOON. MOST OF SOUTHEAST TEXAS REMAINS ON PACE TO RECORD THEIR
WARMEST AVERAGE MONTHLY TEMPERATURE FOR AUGUST AND OBLITERATE THE
WARMEST AVERAGE MONTHLY TEMPERATURE EVER RECORDED. THE WARMEST
AVERAGE MONTHLY TEMPERATURE OCCURRED IN AUGUST OF 2010.

THE LAST 365 DAYS ARE CURRENTLY THE DRIEST ON RECORD FOR THE CITY OF
HOUSTON. IT IS THE FOURTH DRIEST PERIOD ON RECORD FOR HOUSTON HOBBY
AIRPORT...COLLEGE STATION AND THE CITY OF GALVESTON AND THE NINTH
DRIEST FOR DANEVANG. BELOW ARE THE DETAILS:

                DRIEST AUGUST 10 - AUGUST 9 (365 DAYS)
                     YEAR IS THE ENDING DATE

RAINFALL DEFICITS BEGAN SHORTLY AFTER HURRICANE IKE IN 2008.
SOUTHEAST TEXAS RAINFALL WAS BELOW NORMAL IN 2009 AND WELL BELOW
NORMAL IN 2010. THIS DROUGHT HAS BEEN IN THE MAKING FOR SEVERAL
YEARS. HOUSTON HOBBY AIRPORT IS APPROACHING A 21 INCH RAINFALL
DEFICIT FOR THIS YEAR ALONE AND GALVESTON IS SUFFERING A RAINFALL
DEFICIT GREATER THAN 30 INCHES OVER THE LAST THREE YEARS.

2011 HAS BEEN VERY DRY AND IT IS CURRENTLY THE DRIEST YEAR TO DATE
ON RECORD. BELOW ARE THE FIVE DRIEST JANUARY 1 THROUGH AUGUST 10:
THE CITY OF HOUSTON HAS NOW GONE 198 CONSECUTIVE DAYS BETWEEN 1.00
RAIN EVENTS (JAN 24 2011). THIS IS NOW THE LONGEST STREAK IN CITY
HISTORY. THE PREVIOUS LONGEST DURATION BETWEEN 1.00 RAIN EVENTS WAS
192 DAYS AND OCCURRED DURING THE FALL AND WINTER OF 1917-1918.

ALTHOUGH 2011 HAS BEEN EXTREMELY DRY...THE LAST SEVEN MONTHS HAVE
BEEN DOWNRIGHT ARID. REMOVING A RELATIVELY WET JANUARY REVEALS JUST
HOW DRY THE REGION HAS BEEN. WHAT IS STRIKING...IS THE DIFFERENCE
BETWEEN THE DRIEST PERIOD (2011) AND THE SECOND DRIEST PERIOD.
HOUSTON WOULD NEED OVER FIVE INCHES OF RAIN TO DROP BACK INTO SECOND
PLACE. QUITE AMAZING! DANEVANG...GALVESTON AND COLLEGE STATION HAVE
ENDURED THEIR SECOND DRIEST FEB-JULY ON RECORD.AS OF AUGUST 9TH 2011...THE U.S. DROUGHT MONITOR SHOWED ALMOST ALL OF OF SOUTHEAST TEXAS IN D-4 OR EXCEPTIONAL DROUGHT. A SMALL PORTION OF CHAMBERS COUNTY REMAINS IN D-2 STATUS BUT THE WESTERN HALF OF CHAMBERS COUNTY HAS AGAIN BEEN DOWNGRADED TO D-3 AND D-4 STATUS. THE NORTHWEST CORNER OF LIBERTY COUNTY IS AGAIN CLASSIFIED AS D-4 BUT THE REST OF THE COUNTY IS D-3. HOUSTON COUNTY HAS AGAIN BEEN
CLASSIFIED AS D-4. THE REST OF SOUTHEAST TEXAS REMAINS CLASSIFIED AS
EXCEPTIONAL DROUGHT.
BELOW IS A BRIEF DESCRIPTION OF EACH DROUGHT CLASSIFICATION:

D4 EXCEPTIONAL DROUGHT - EXCEPTIONAL OR WIDESPREAD CROP/PASTURE LOSS
   A SHORTAGE OF WATER IN RESERVOIRS AND STREAMS CREATING
   A WATER EMERGENCY.

D3 EXTREME DROUGHT - MAJOR CROP OR PASTURE LOSSES. WIDESPREAD WATER
   SHORTAGES AND RESTRICTIONS.

D2 SEVERE DROUGHT - CROP OR PASTURE LOSSES LIKELY. SOME WATER
   SHORTAGES COMMON AND SOME WATER RESTRICTIONS IMPOSED.

D1 MODERATE DROUGHT - SOME DAMAGE TO CROPS AND PASTURES. RESERVOIRS
   OR WELLS LOW. VOLUNTARY WATER RESTRICTIONS IMPOSED.

D0 ABNORMALLY DRY - SHORT TERM DRYNESS. PLANT GROWTH SLOWS. MINOR
   WATER DEFICITS.

AGRICULTURAL IMPACTS...
HAY PRODUCTION REMAINS EXTREMELY LIMITED. ACROSS THE STATE OF
TEXAS...94 PERCENT OF PASTURE OR RANGELAND IS RATED AS POOR OR IN
VERY POOR CONDITION. LIVESTOCK PRODUCERS CONTINUED TO CULL HERDS AND
IN SOME SITUATIONS COMPLETELY LIQUIDATE HERDS. COTTON HARVESTS
CONTINUE WITH GENERALLY FAIR YIELDS. LARGE TREES WERE DYING ACROSS
SOUTHEAST TEXAS. WATER DIVERSION FOR THE LOWER BRAZOS RIVER HAS BEEN
SUSPENDED FOR ALL USES EXCEPT FOR MUNICIPAL AND LIVESTOCK WATERING.

Tuesday, August 9, 2011

Why are tee tops burned up?

 Many of you may be wondering what happened to some of the tee boxes and fairways? They were lush and soft and now they are burned up and hard as a rock.

Reasoning; On a Thursday I had noticed some hot spots beginning to develop on greens #3,4,5,7, so some extra hand watering had been applied as we usually do.
 By Saturday morning these same greens were drying up quickly and the tee boxes had begun to dry out along with the fairways. Saturday morning three hours worth of hand watering greens wasn't enough to slow down the drying up conditions, therefore a second trip out for the day to hand water had to be done.
 Sunday morning holes #2,3,4 were smoking hot, we then found out #4 fairway controller near #4 green had caught fire and burned up the inside of the controller. When the signal was sent out to start irrigation at night it was getting backfired and ended up knocking out the power to the controllers on holes #2,3,4,7. Once again I spent the day plus the evening out at the course hand watering and watering with sprinklers that I could get working.
 Monday morning same procedure kept going all day. Our Irrigation Technician Serafin Gomez was able to get the controller at #4 rebuilt. We then tested the signals and all was good was again.
 So for the next 7 to 10 days you could be seeing some discoloration on tee tops and fairways, just be aware we our fighting clawing to get the course back to good condition.

Thanks
Willy Plowman
Golf Course Superintendent